

MongoDB Atlas has several network security options. One of them is traditional IP whitelisting, which is very convenient when your business logic, which needs access to the MongoDB Atlas, has a static IP address. Or you can set 0.0.0.0/0 to access to the database, which opens your database to the public. It is very dangerous and you should avoid it.
At Twigfarm, we use AWS lambda very often. We had cases where our lambdas needs access to the MongoDB Atlas database. As you might already know, unlike AWS EC2, you cannot set a static IP address for AWS lambda easily. It is possible using an AWS NAT Gateway but requires a bit of work, which is out of scope in this article. I will cover that topic later if I have a chance.
Let’s create a lambda function that is trying to access to the MongoDB Atlas database. Obviously, it is not going to work and gets timeout because the MongoDB Atlas database does not allow this connection yet.
Lambda code is as the following; the code snippet is copied from here and modified.
You need MongoDB Nods.js Driver to run the following code. Please refer to the following link: https://www.npmjs.com/package/mongodb
To use the third-party library in a lambda, I prefer to have the libraries in a layer. You can refer to the following link for layers in lambda functions. https://docs.aws.amazon.com/lambda/latest/dg/configuration-layers.html
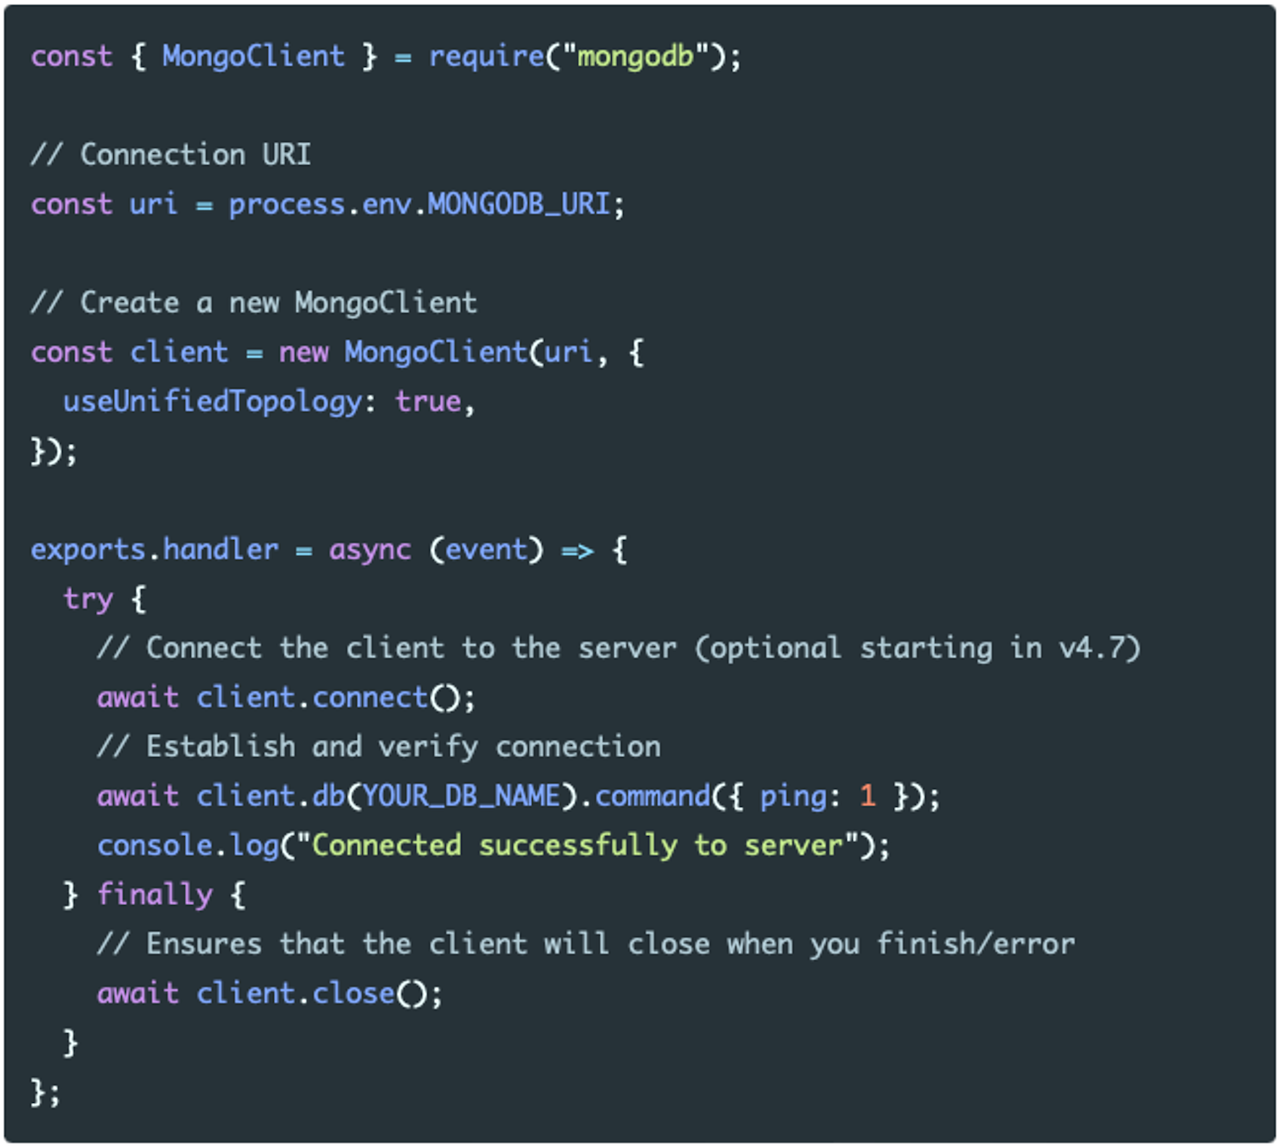
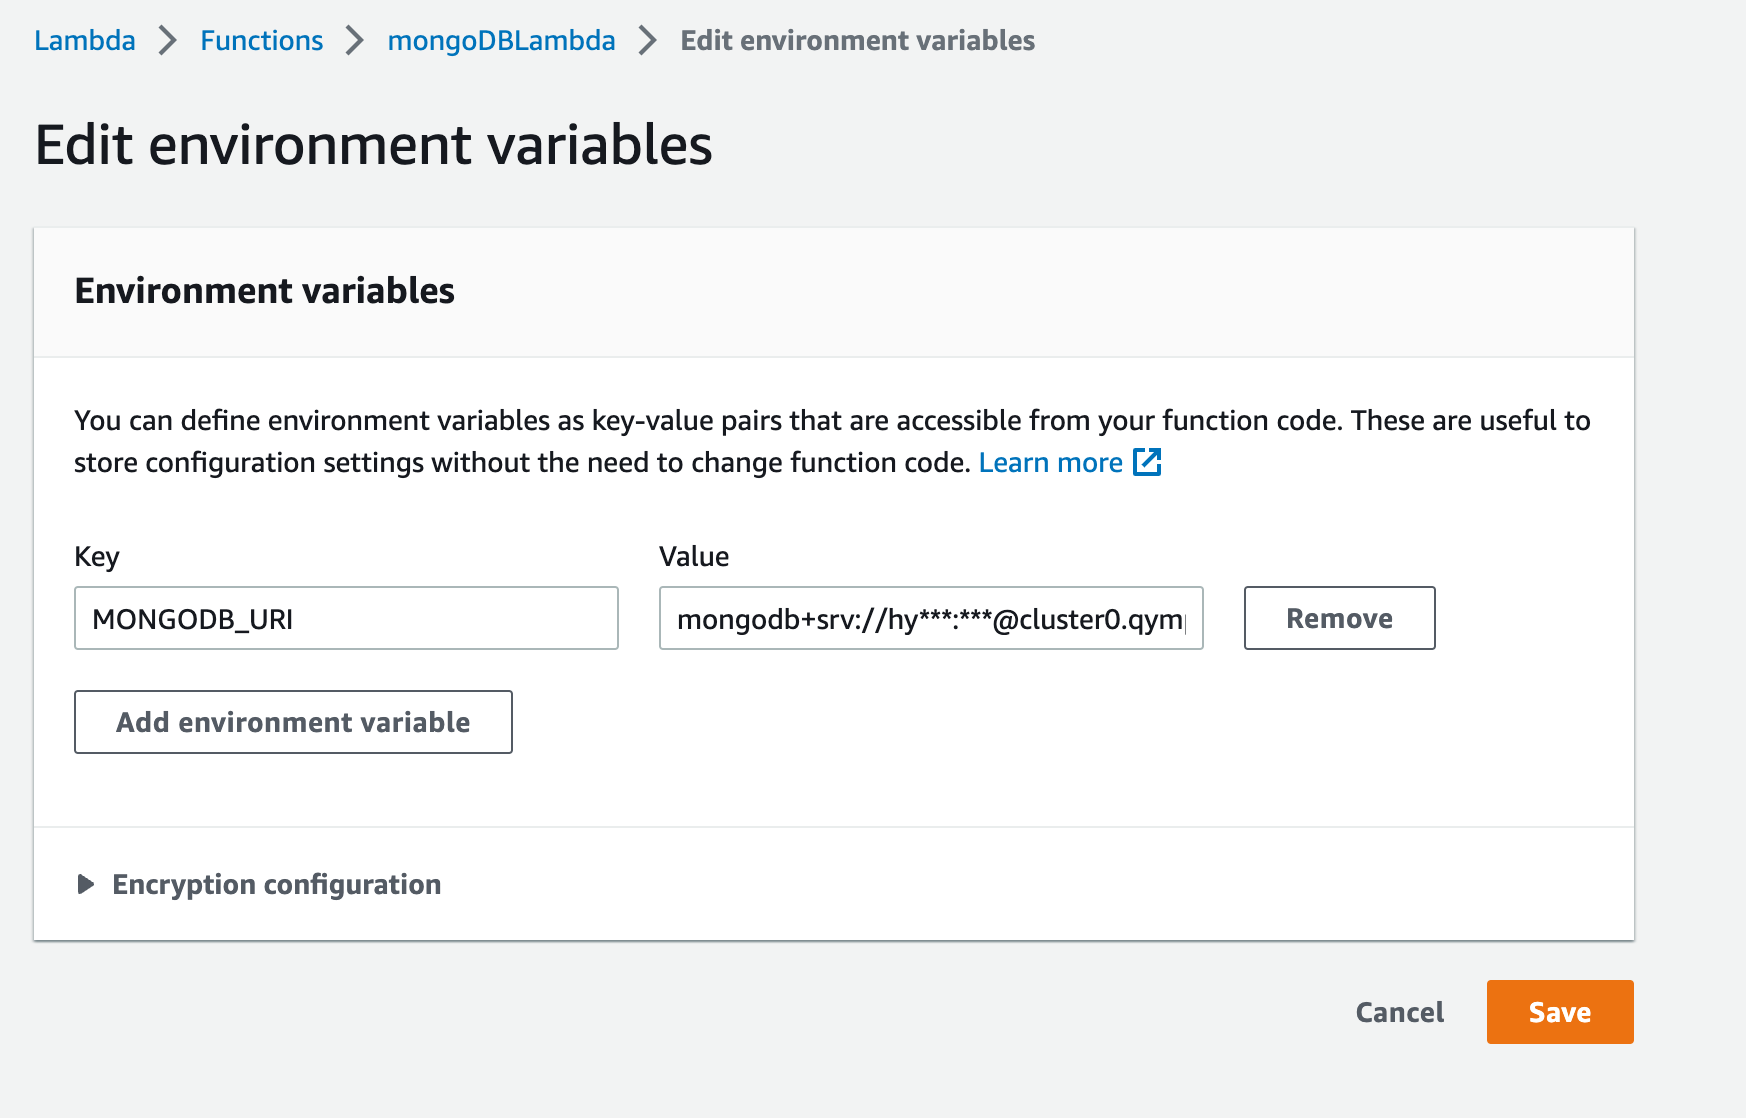
Then we set the MONGODB_URI to your MongoDB Atlas connection string.
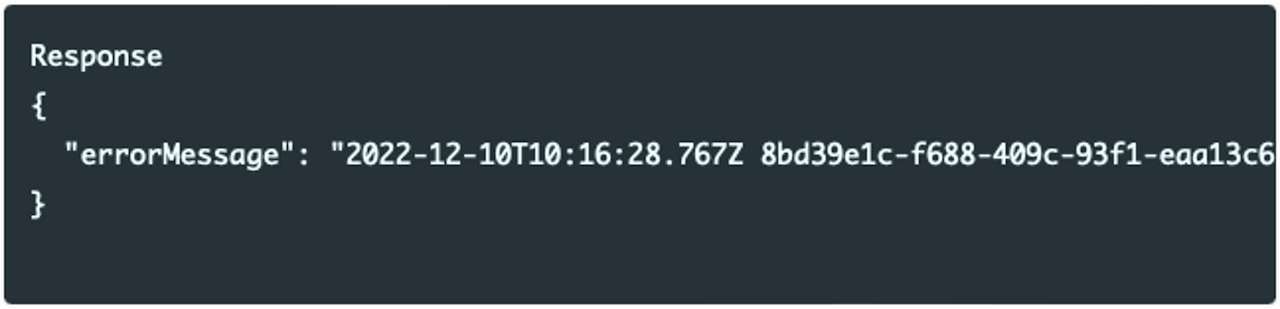
Then you click the Test button to run the lambda function. If you haven’t created a test case before, just leave everything as it is and name the test case and save it. Then click the Test button again.
You should get a timeout response such as the following because your lambda is not whitelisted in the MongoDB Atlas database.
Go to AWS VPC. Then click Create VPC button.
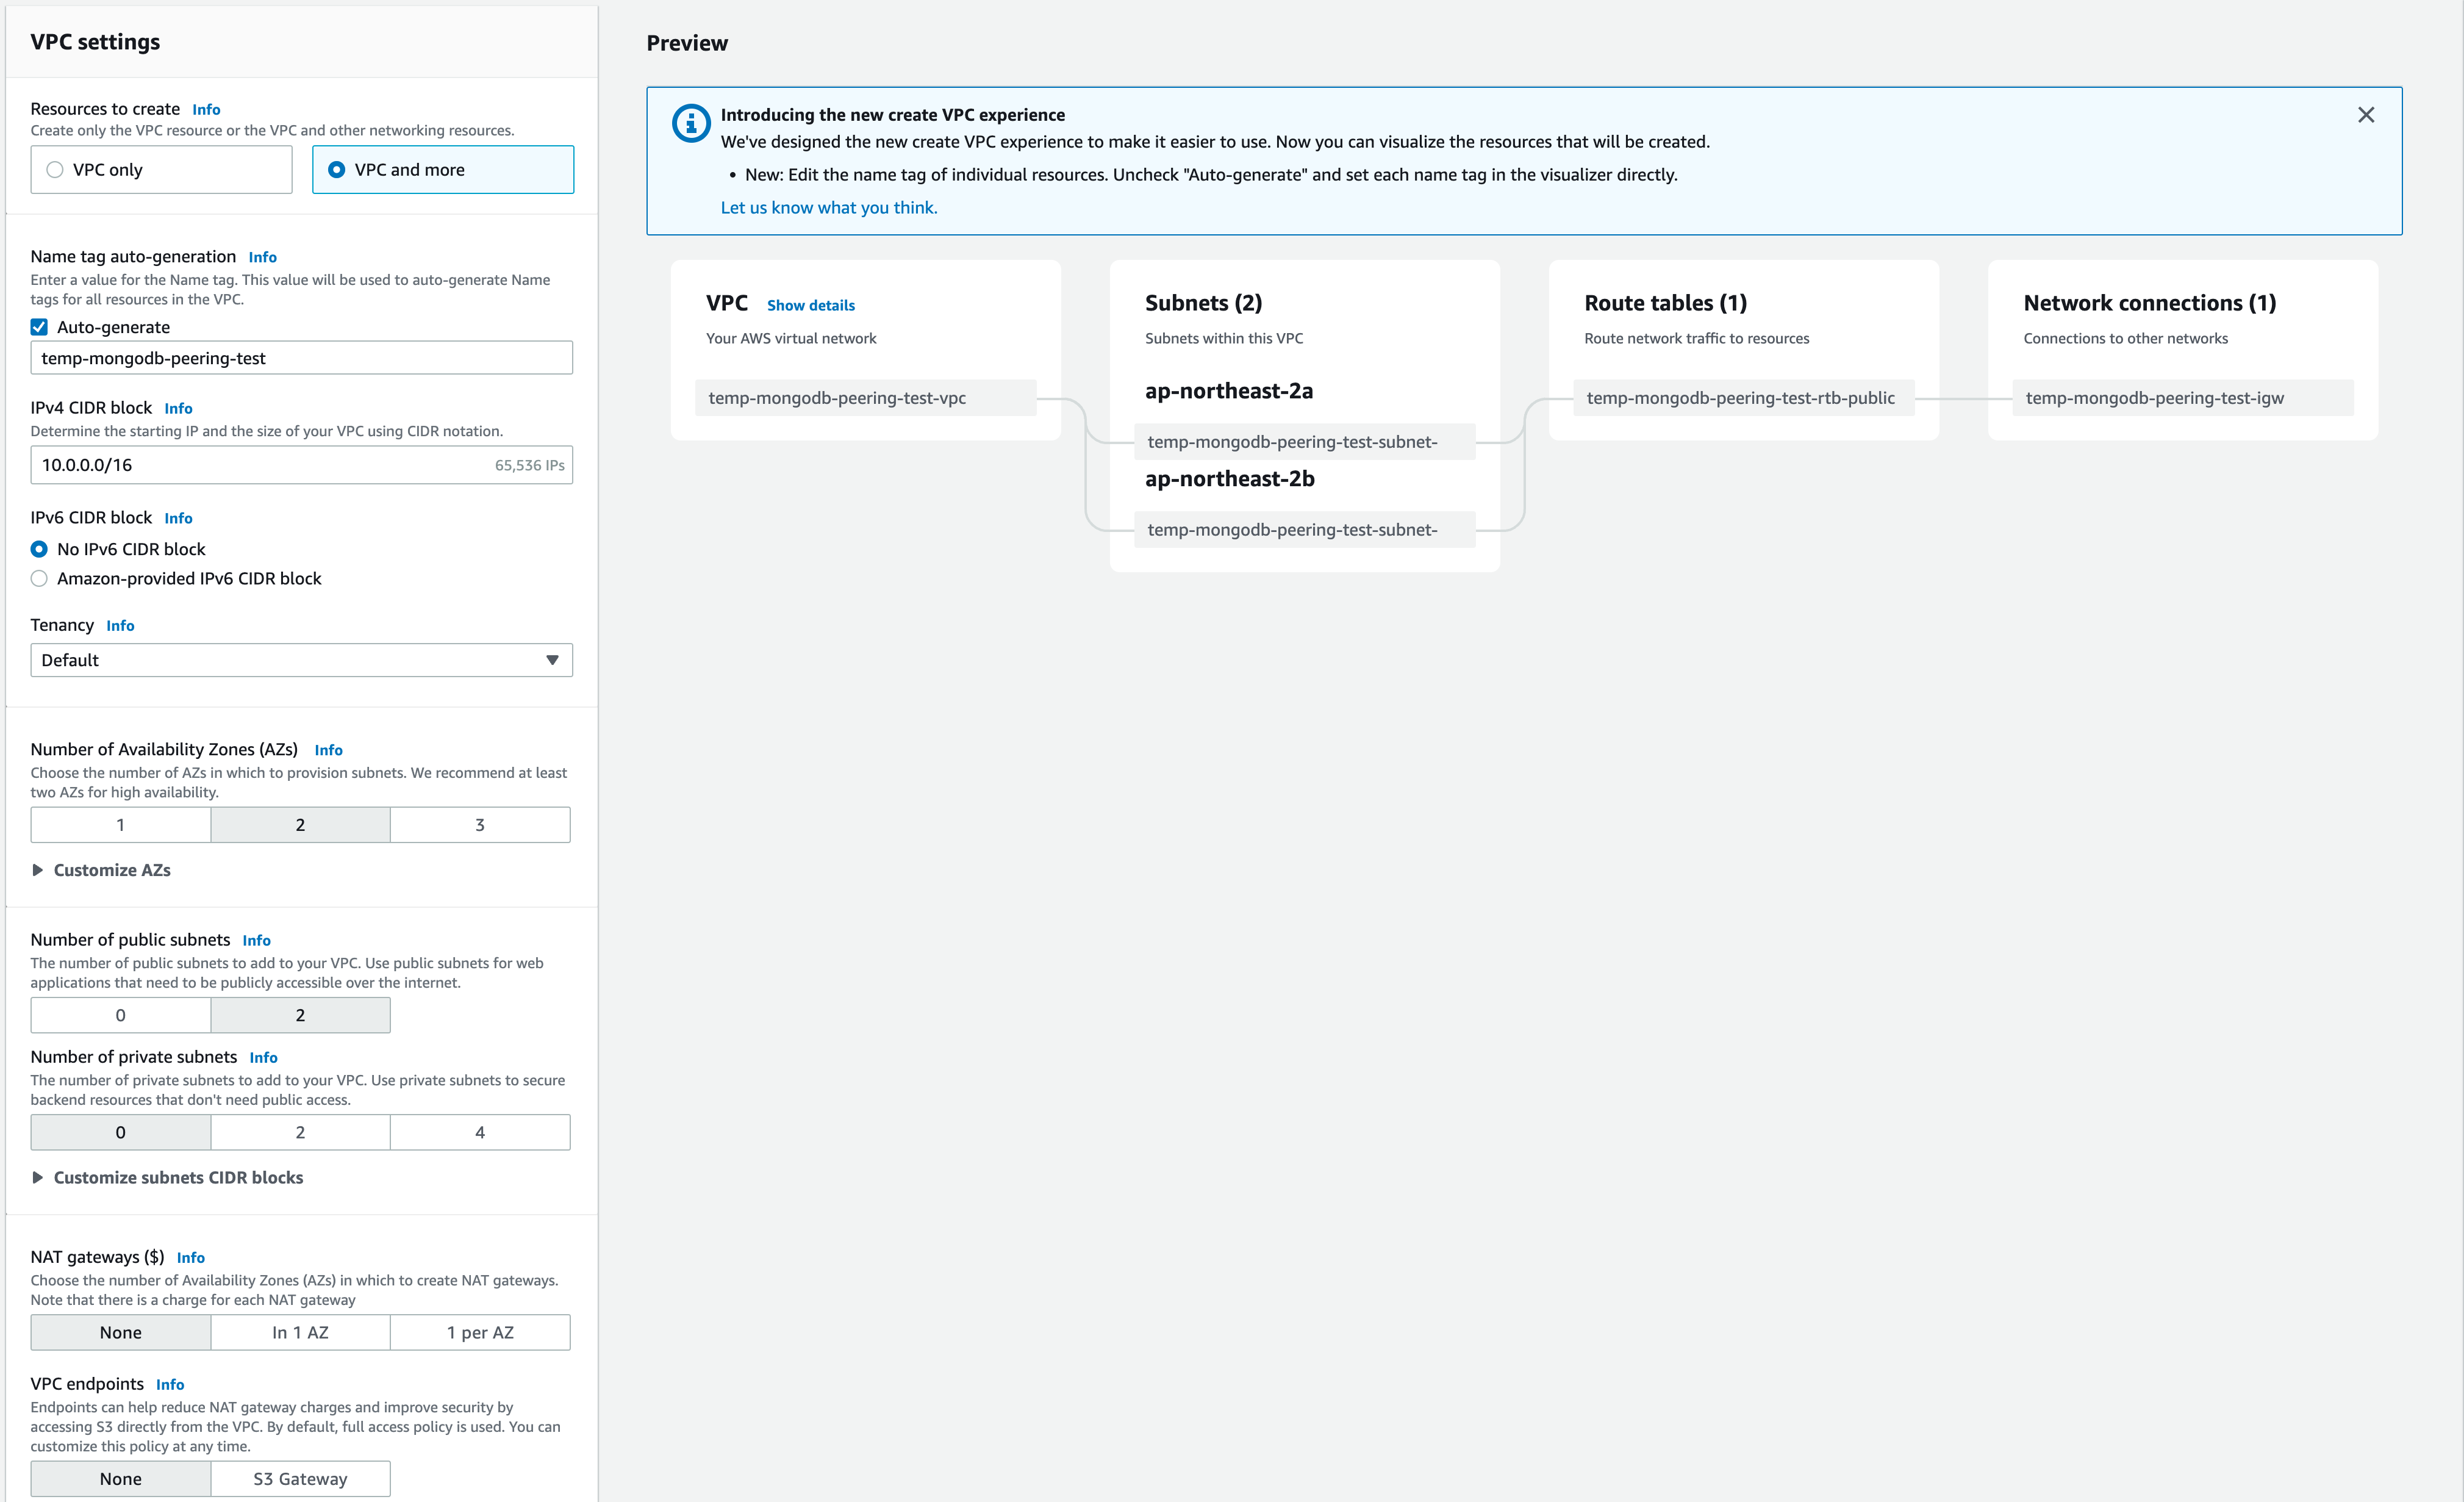
Here I have a couple of public subnets and no private subnets for simplicity.
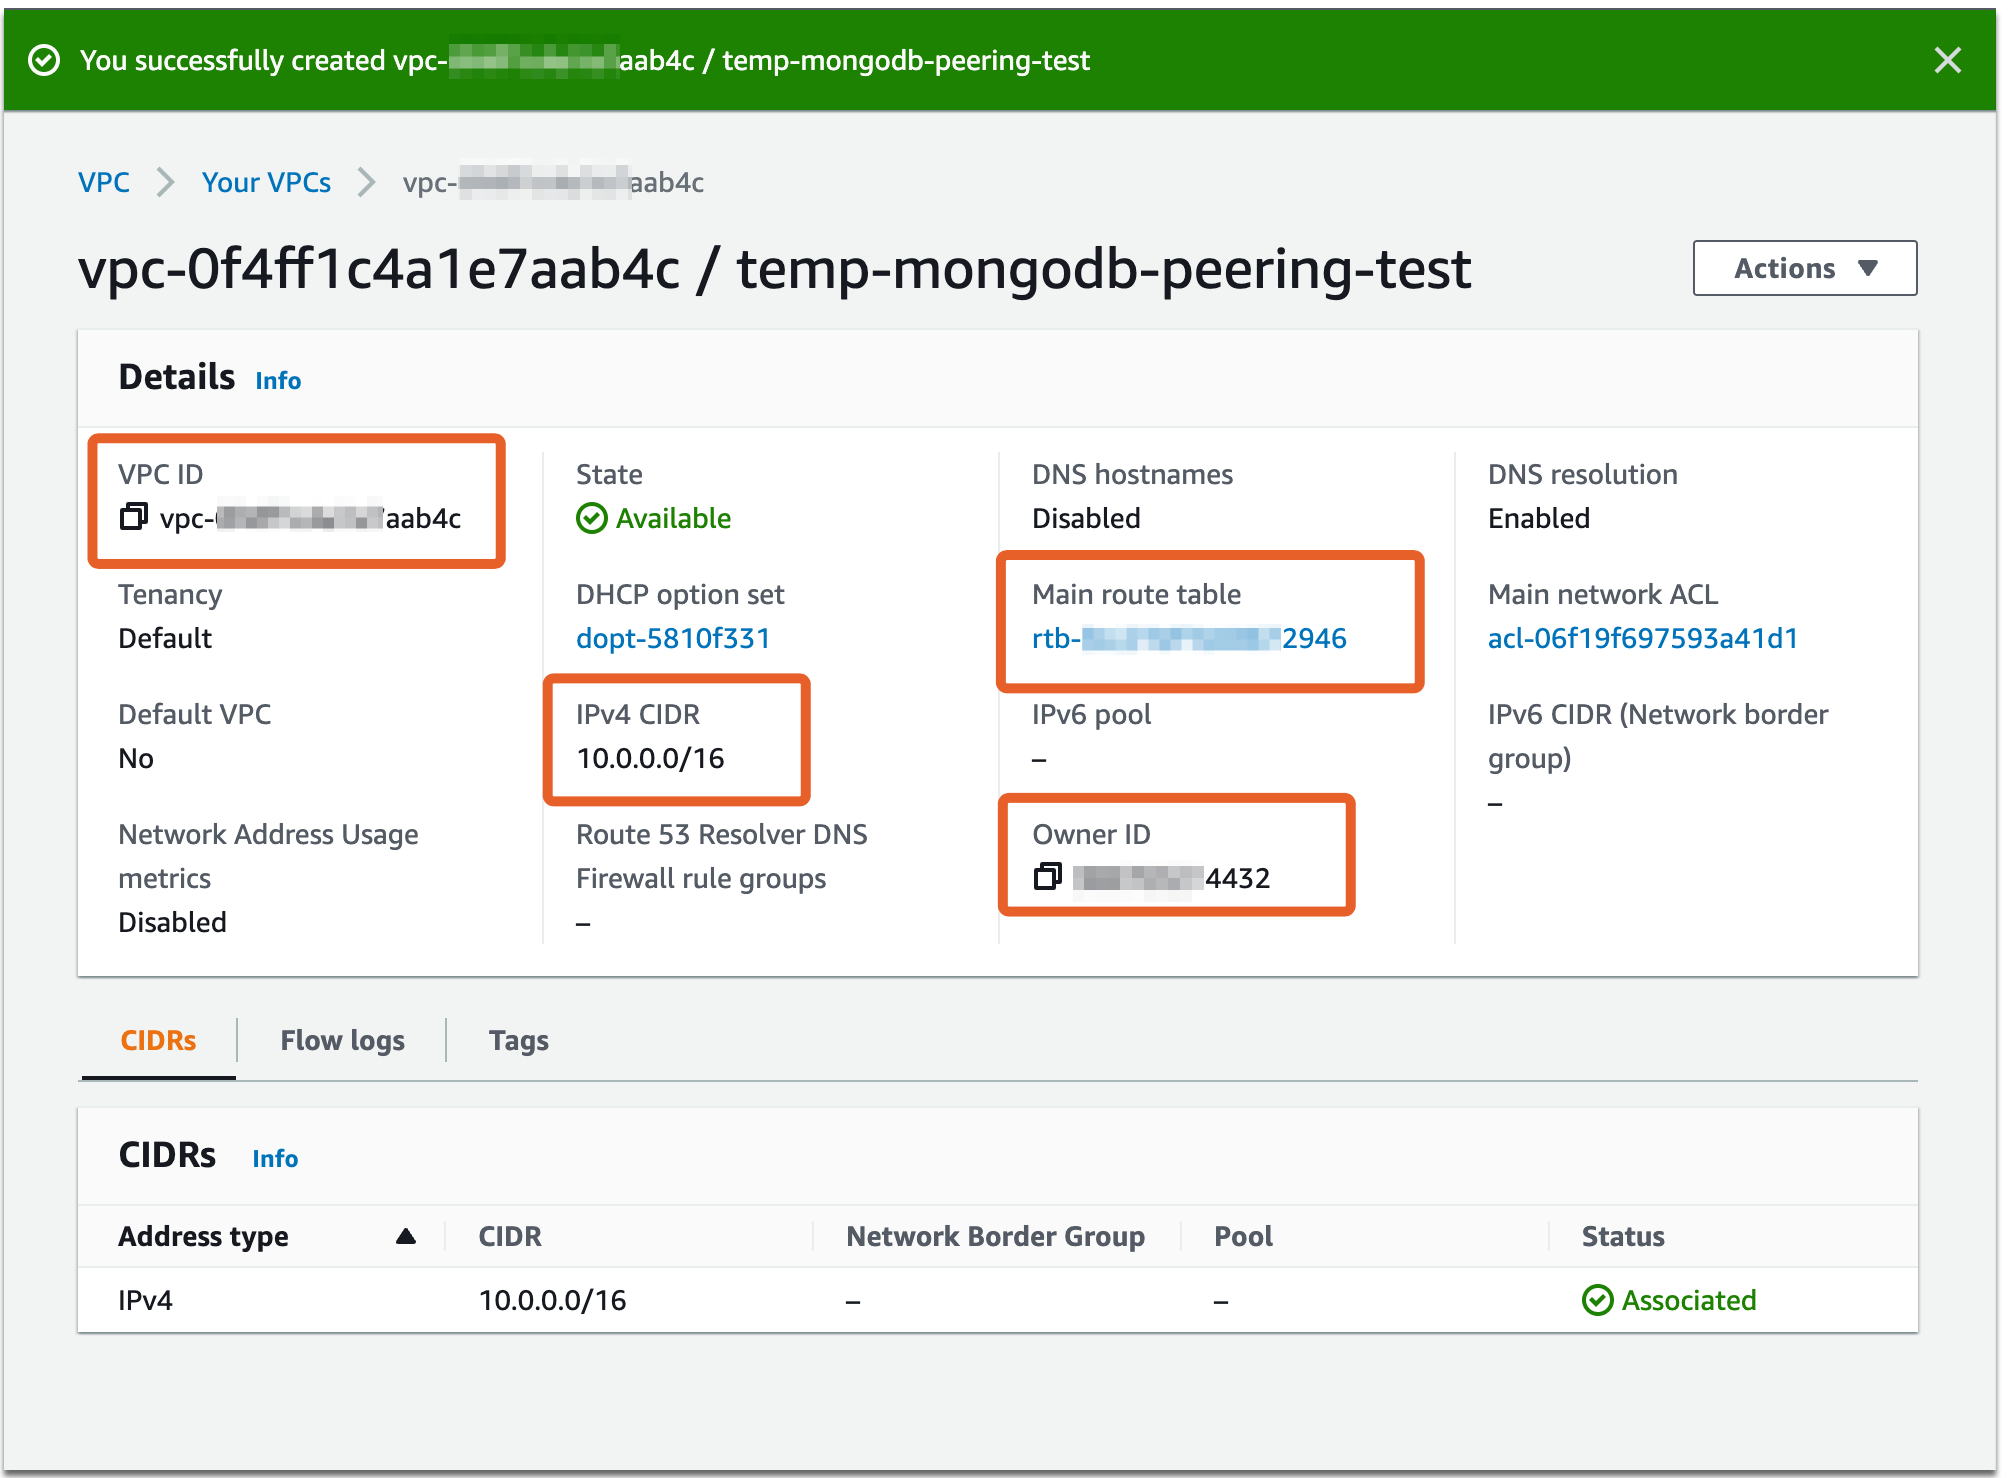
These are the result of the VPC creation and highlighted are strings to be used at the MongoDB Atlas
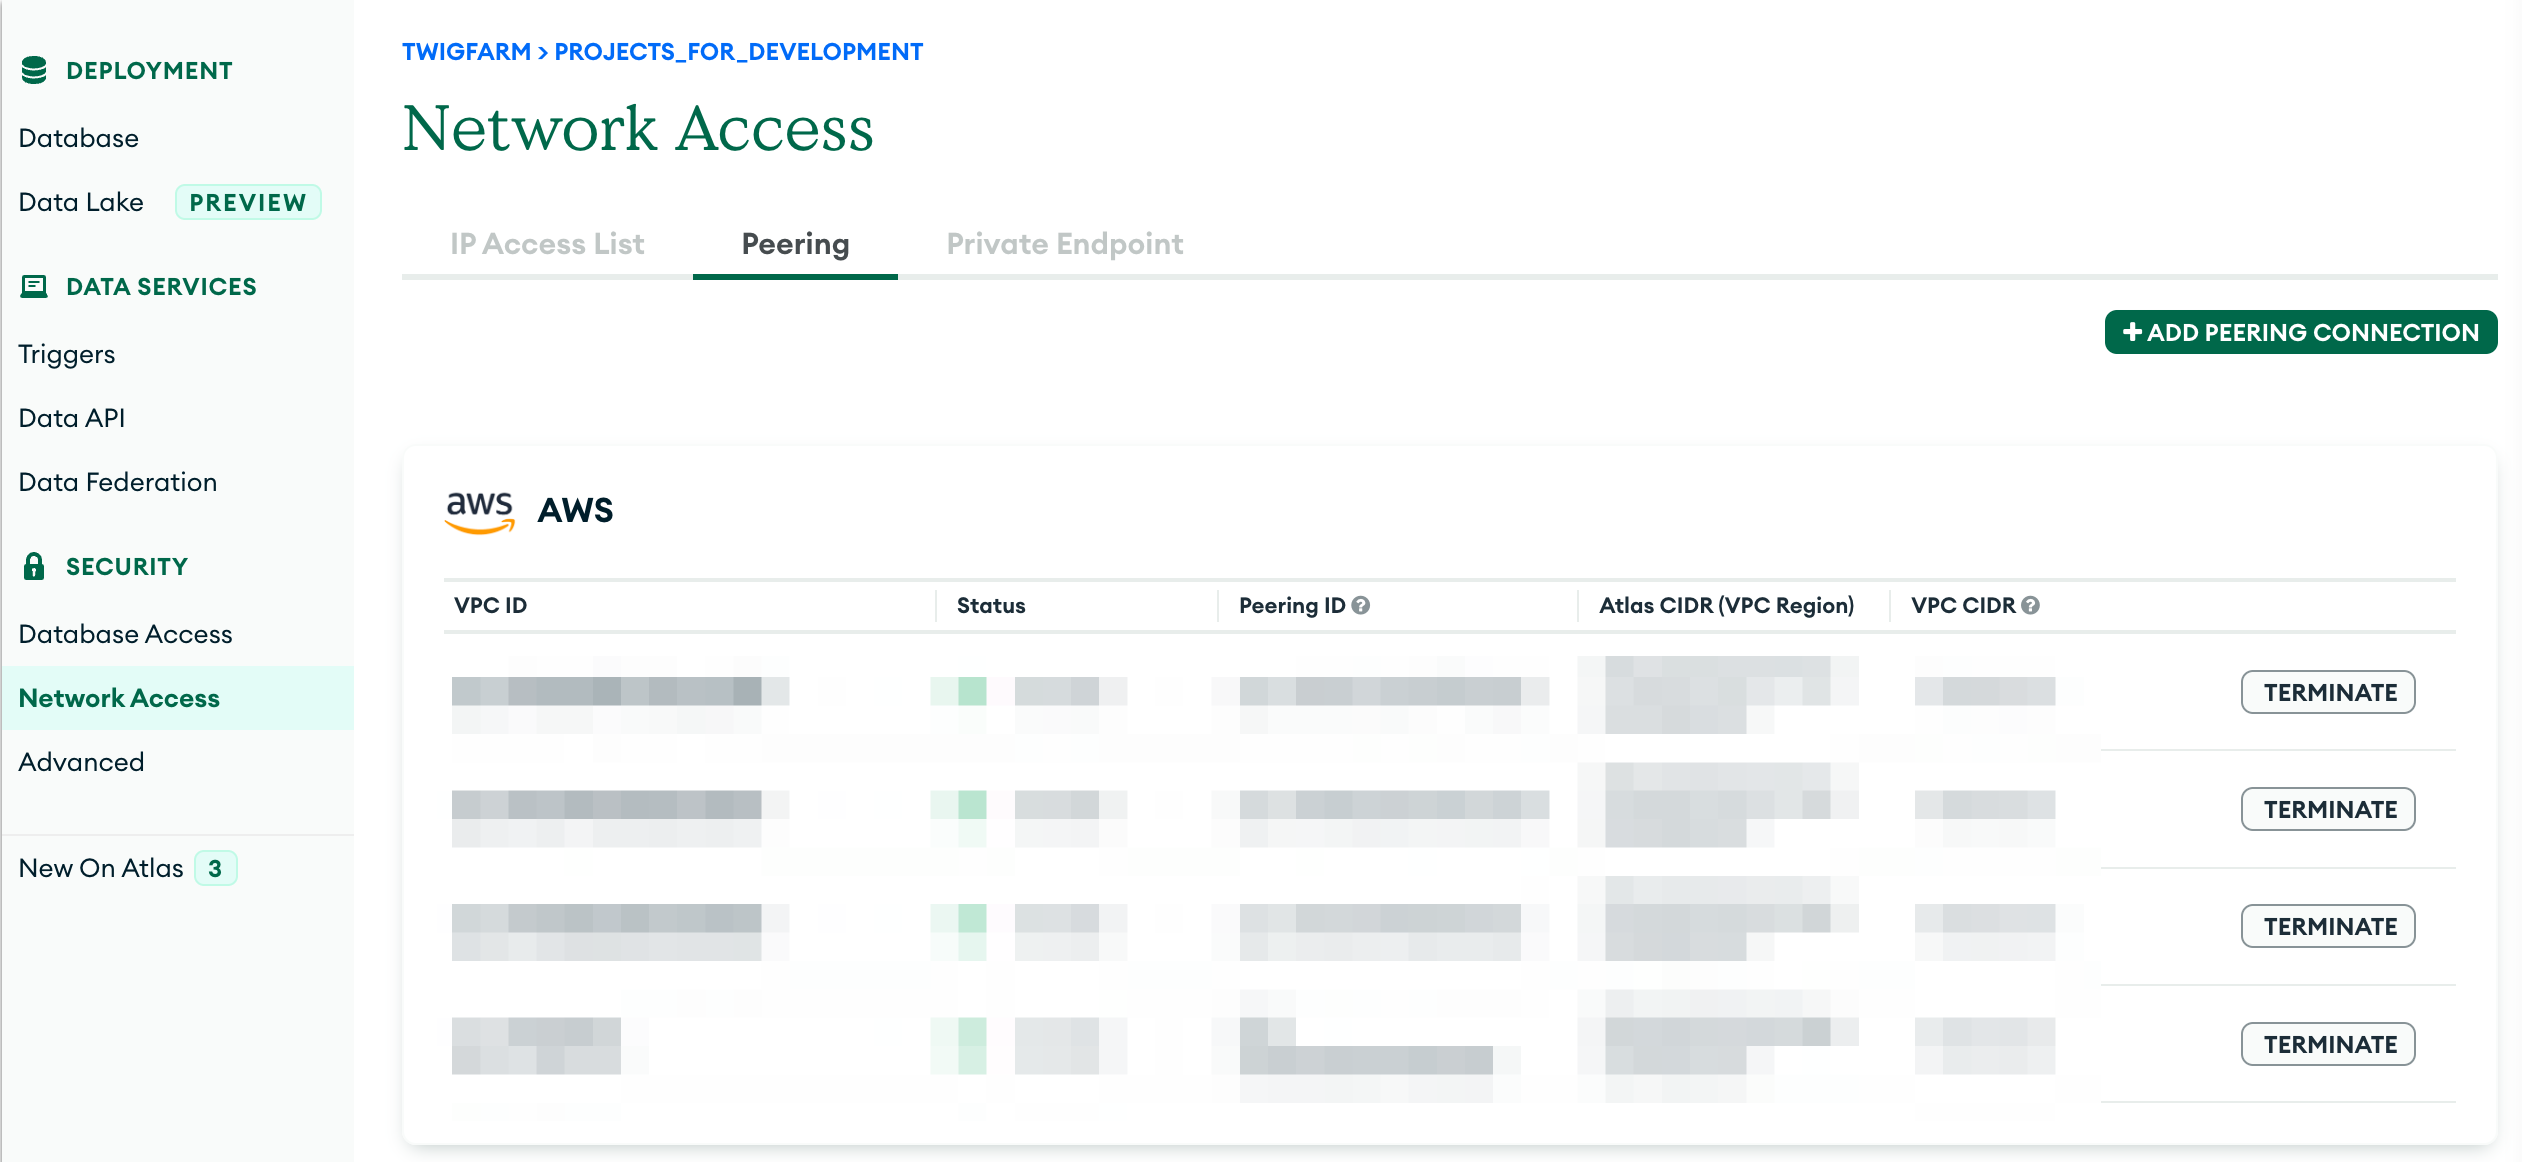
Log in to MongoDB Atlas and choose your project to connect to the lambda function. Click Network Access and select Peering tab. I have a few VPC peering connections already but, likely, that you don’t have any. Click ADD PEERING CONNECTION button to create a new connection.
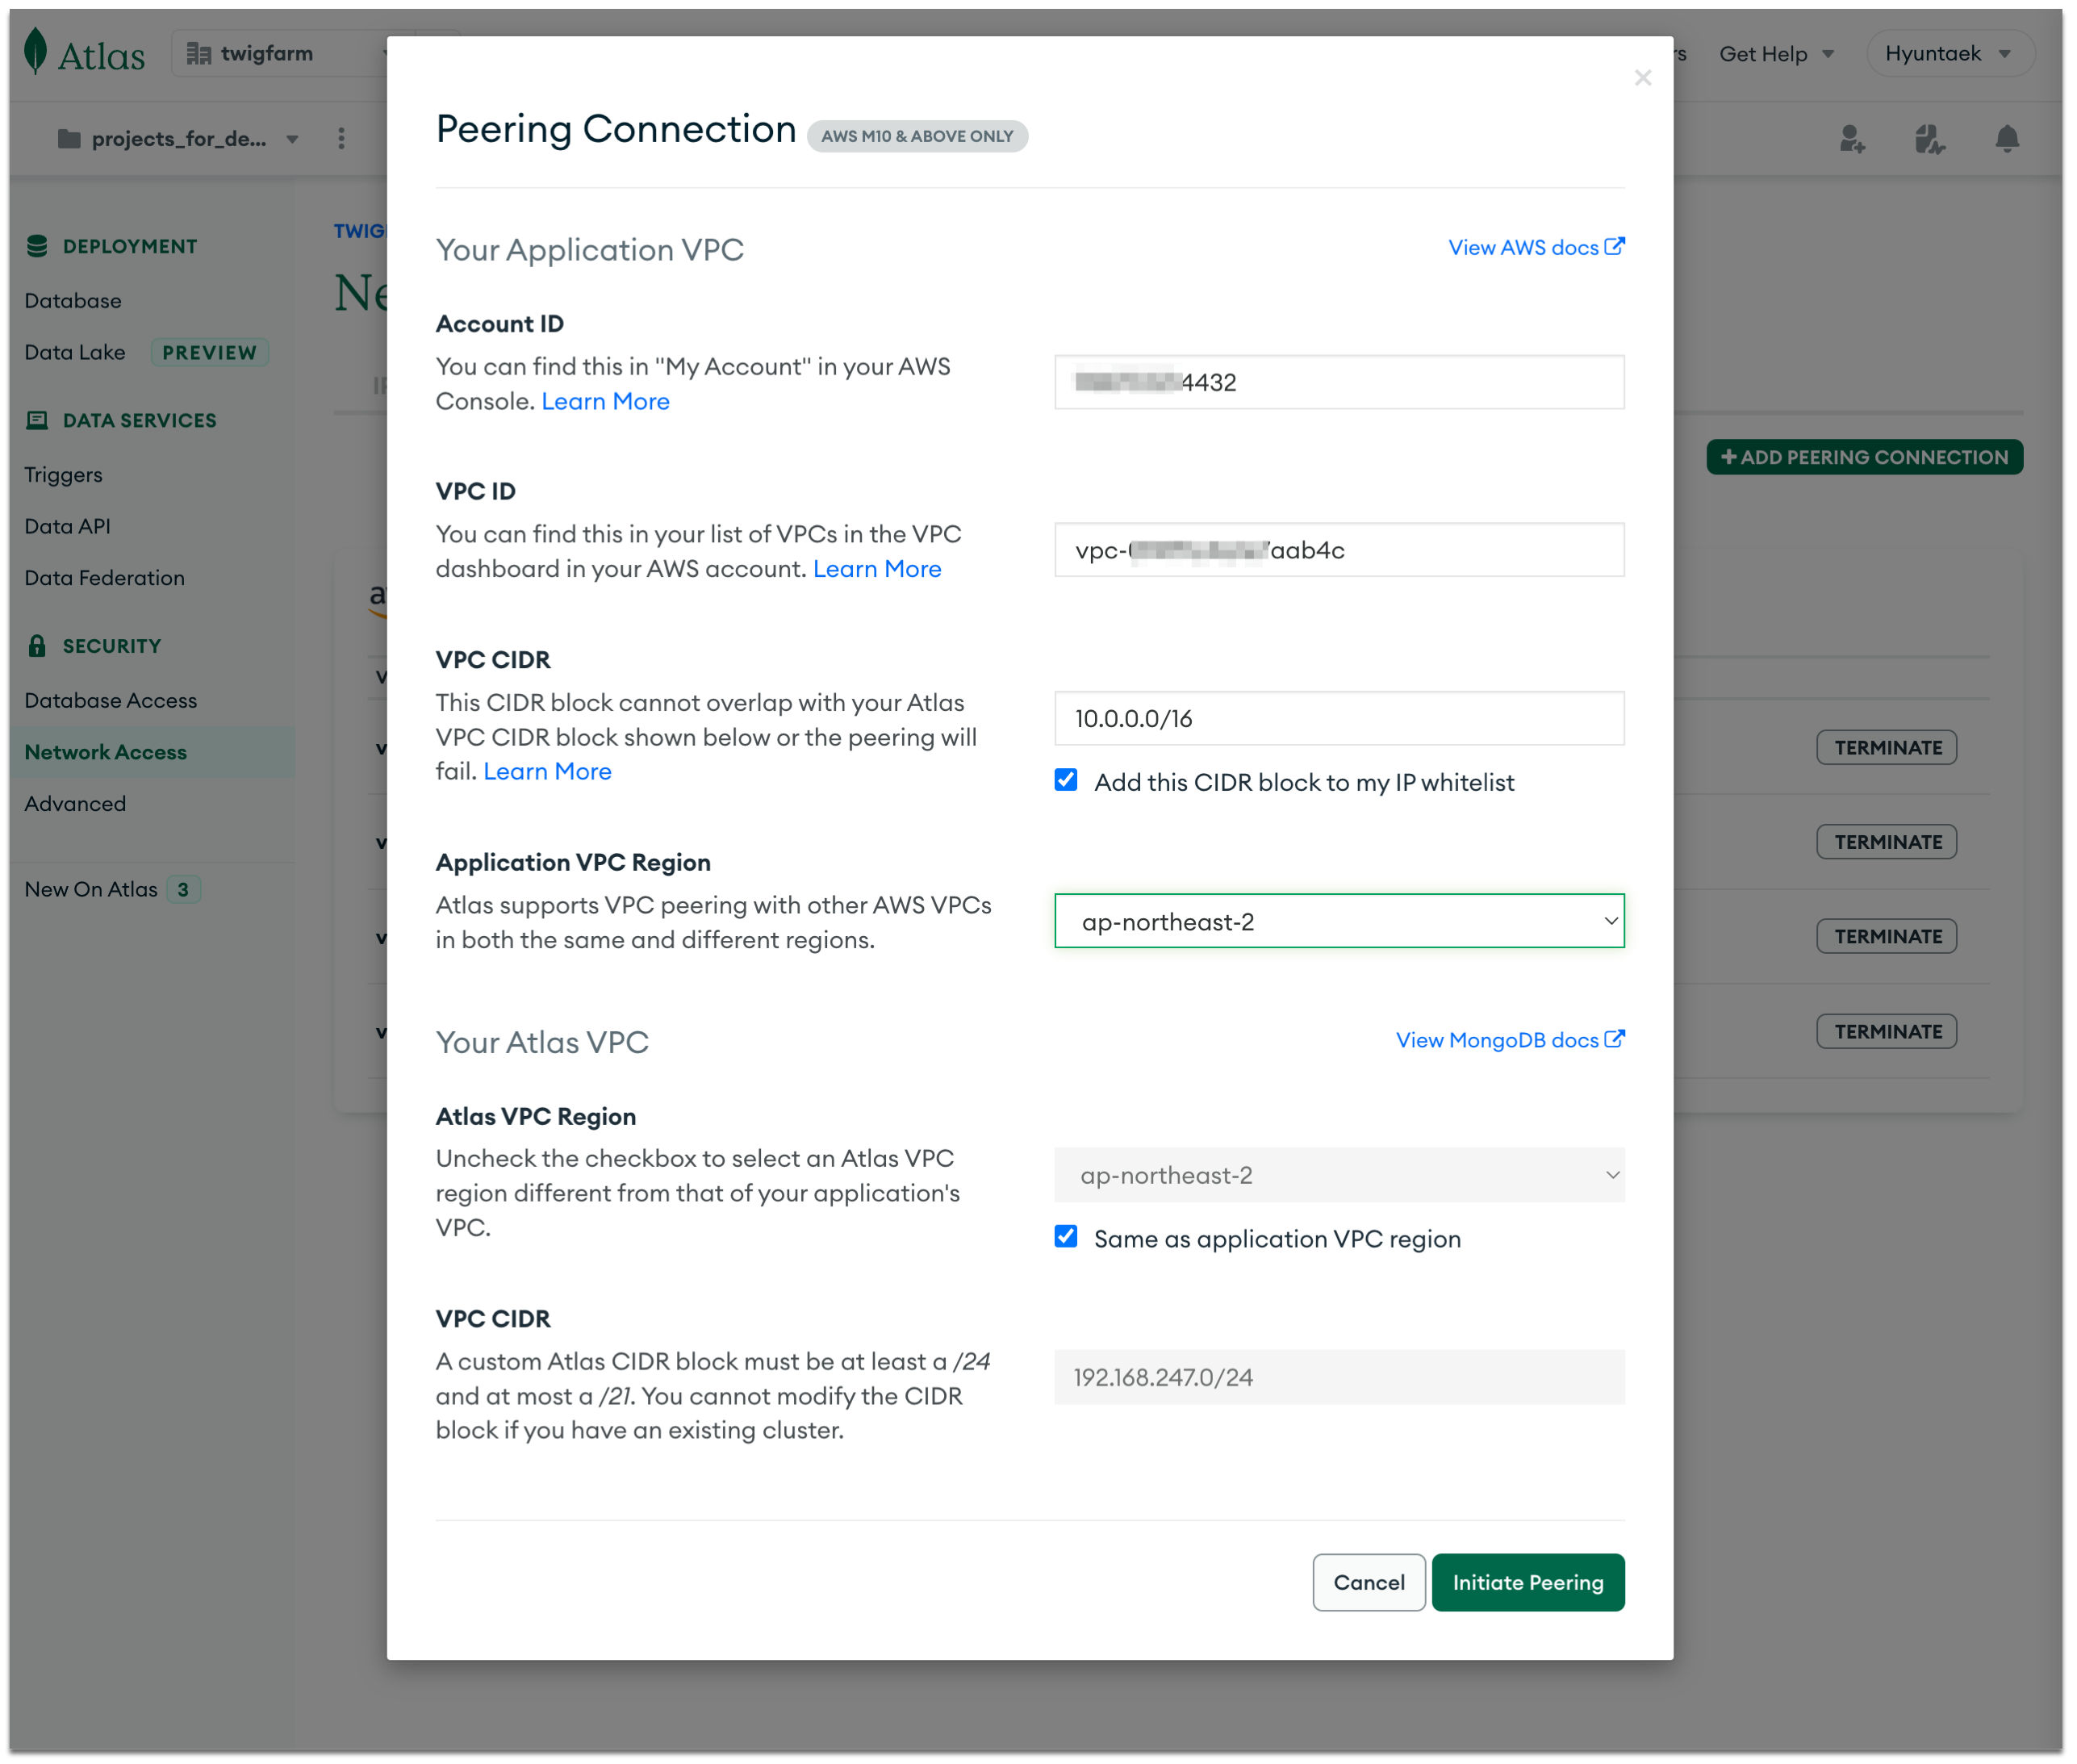
Choose AWS. Click Next.
Fill in the Account ID, VPC ID, and VPC CIDR with the above VPC information. Then click Initiate Peering.
Now go back to the AWS VPC and choose Peering connections. Choose the peering connection and then Actions and choose Accept request.
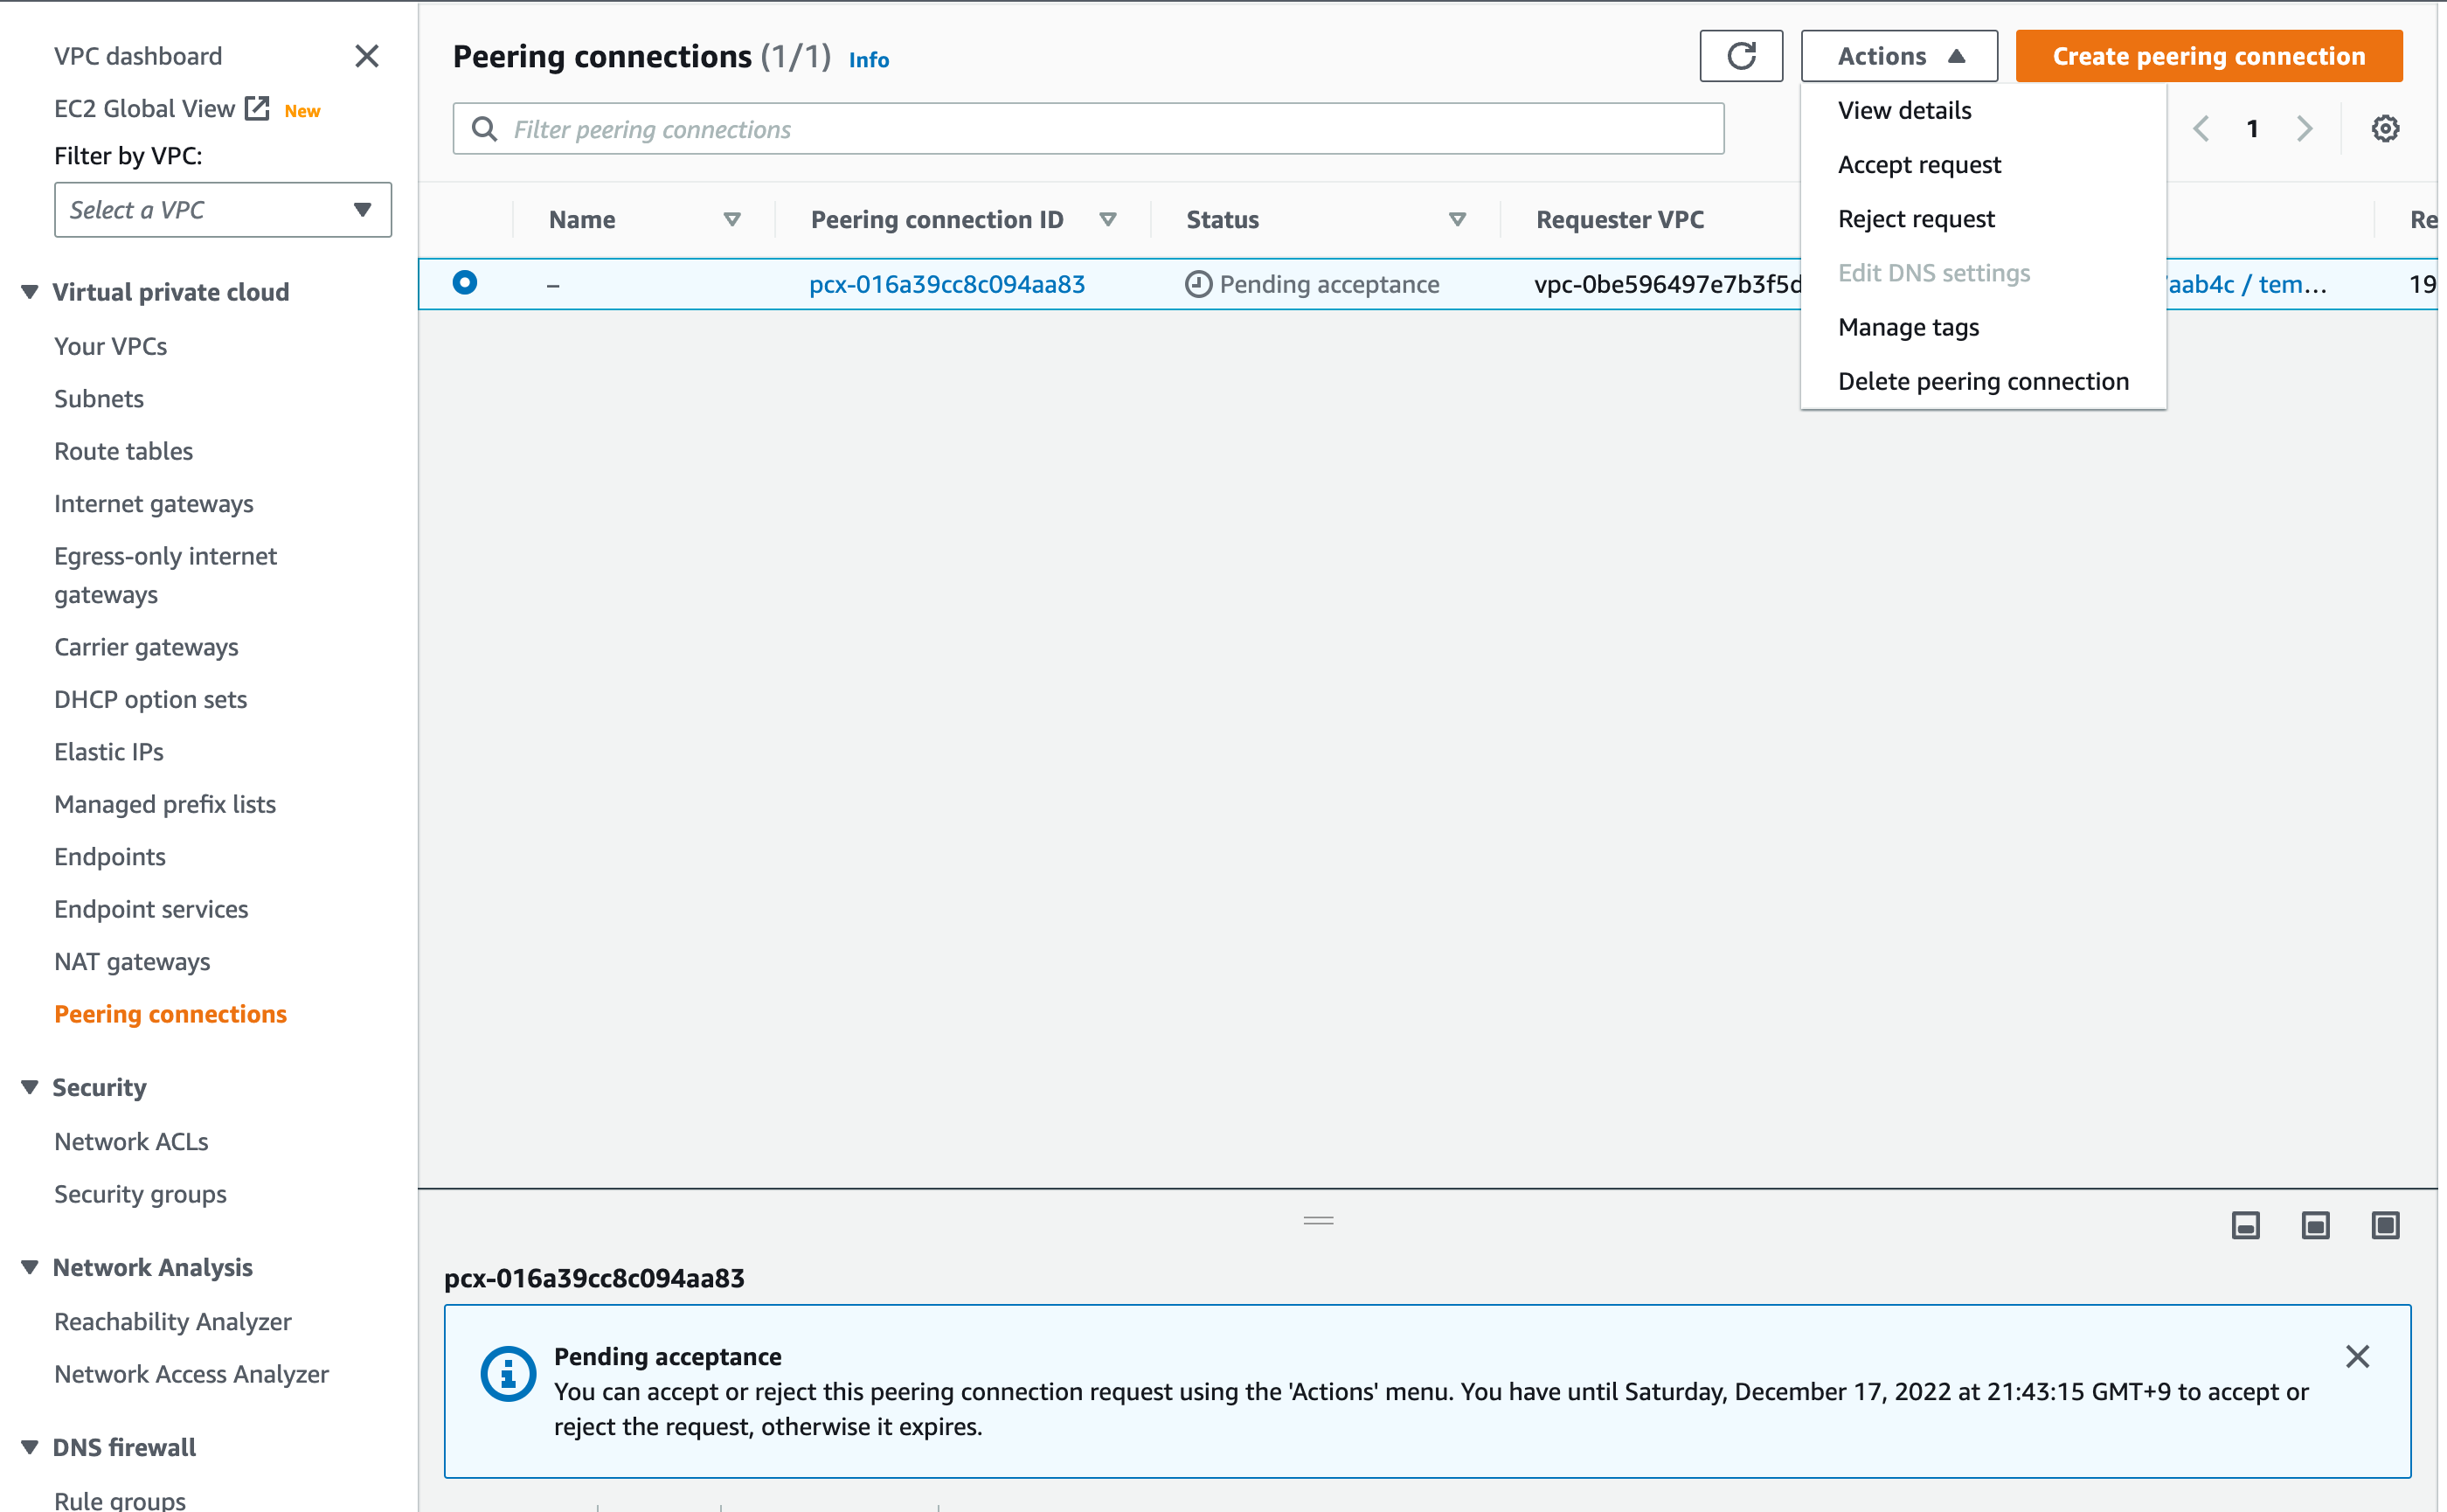
You’ll see the Status is changed to Active.
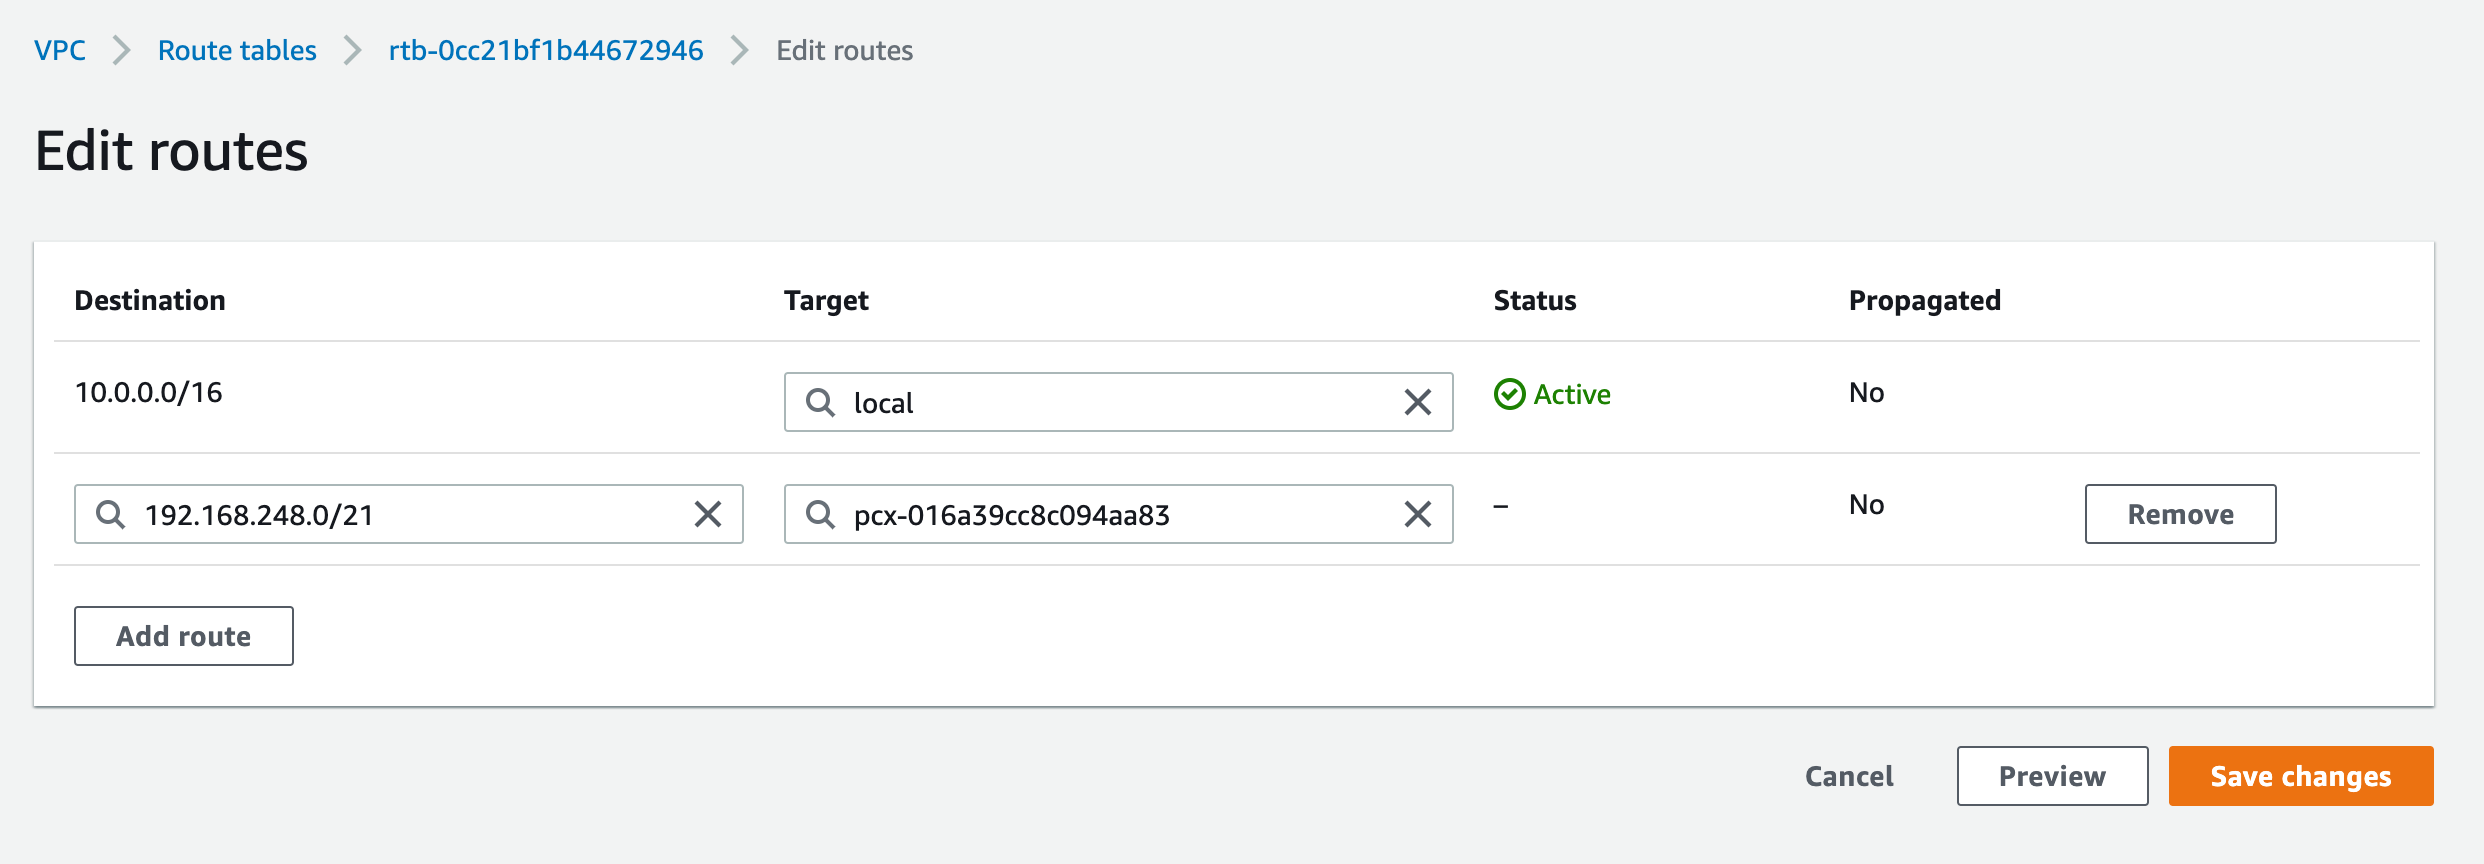
This is is the last step of the VPC Peering. Go to the AWS VPC then choose the Route tables. Choose the route table for the VPC and click Edit routes then Add route.
Add the VPC CIDR value we obtained from the MongoDB Atlas Peering Connection. In my case, it is 192.168.248.0/21 for the Destination field. Choose the Peering Connection and the Peering connection ID for the Target field.
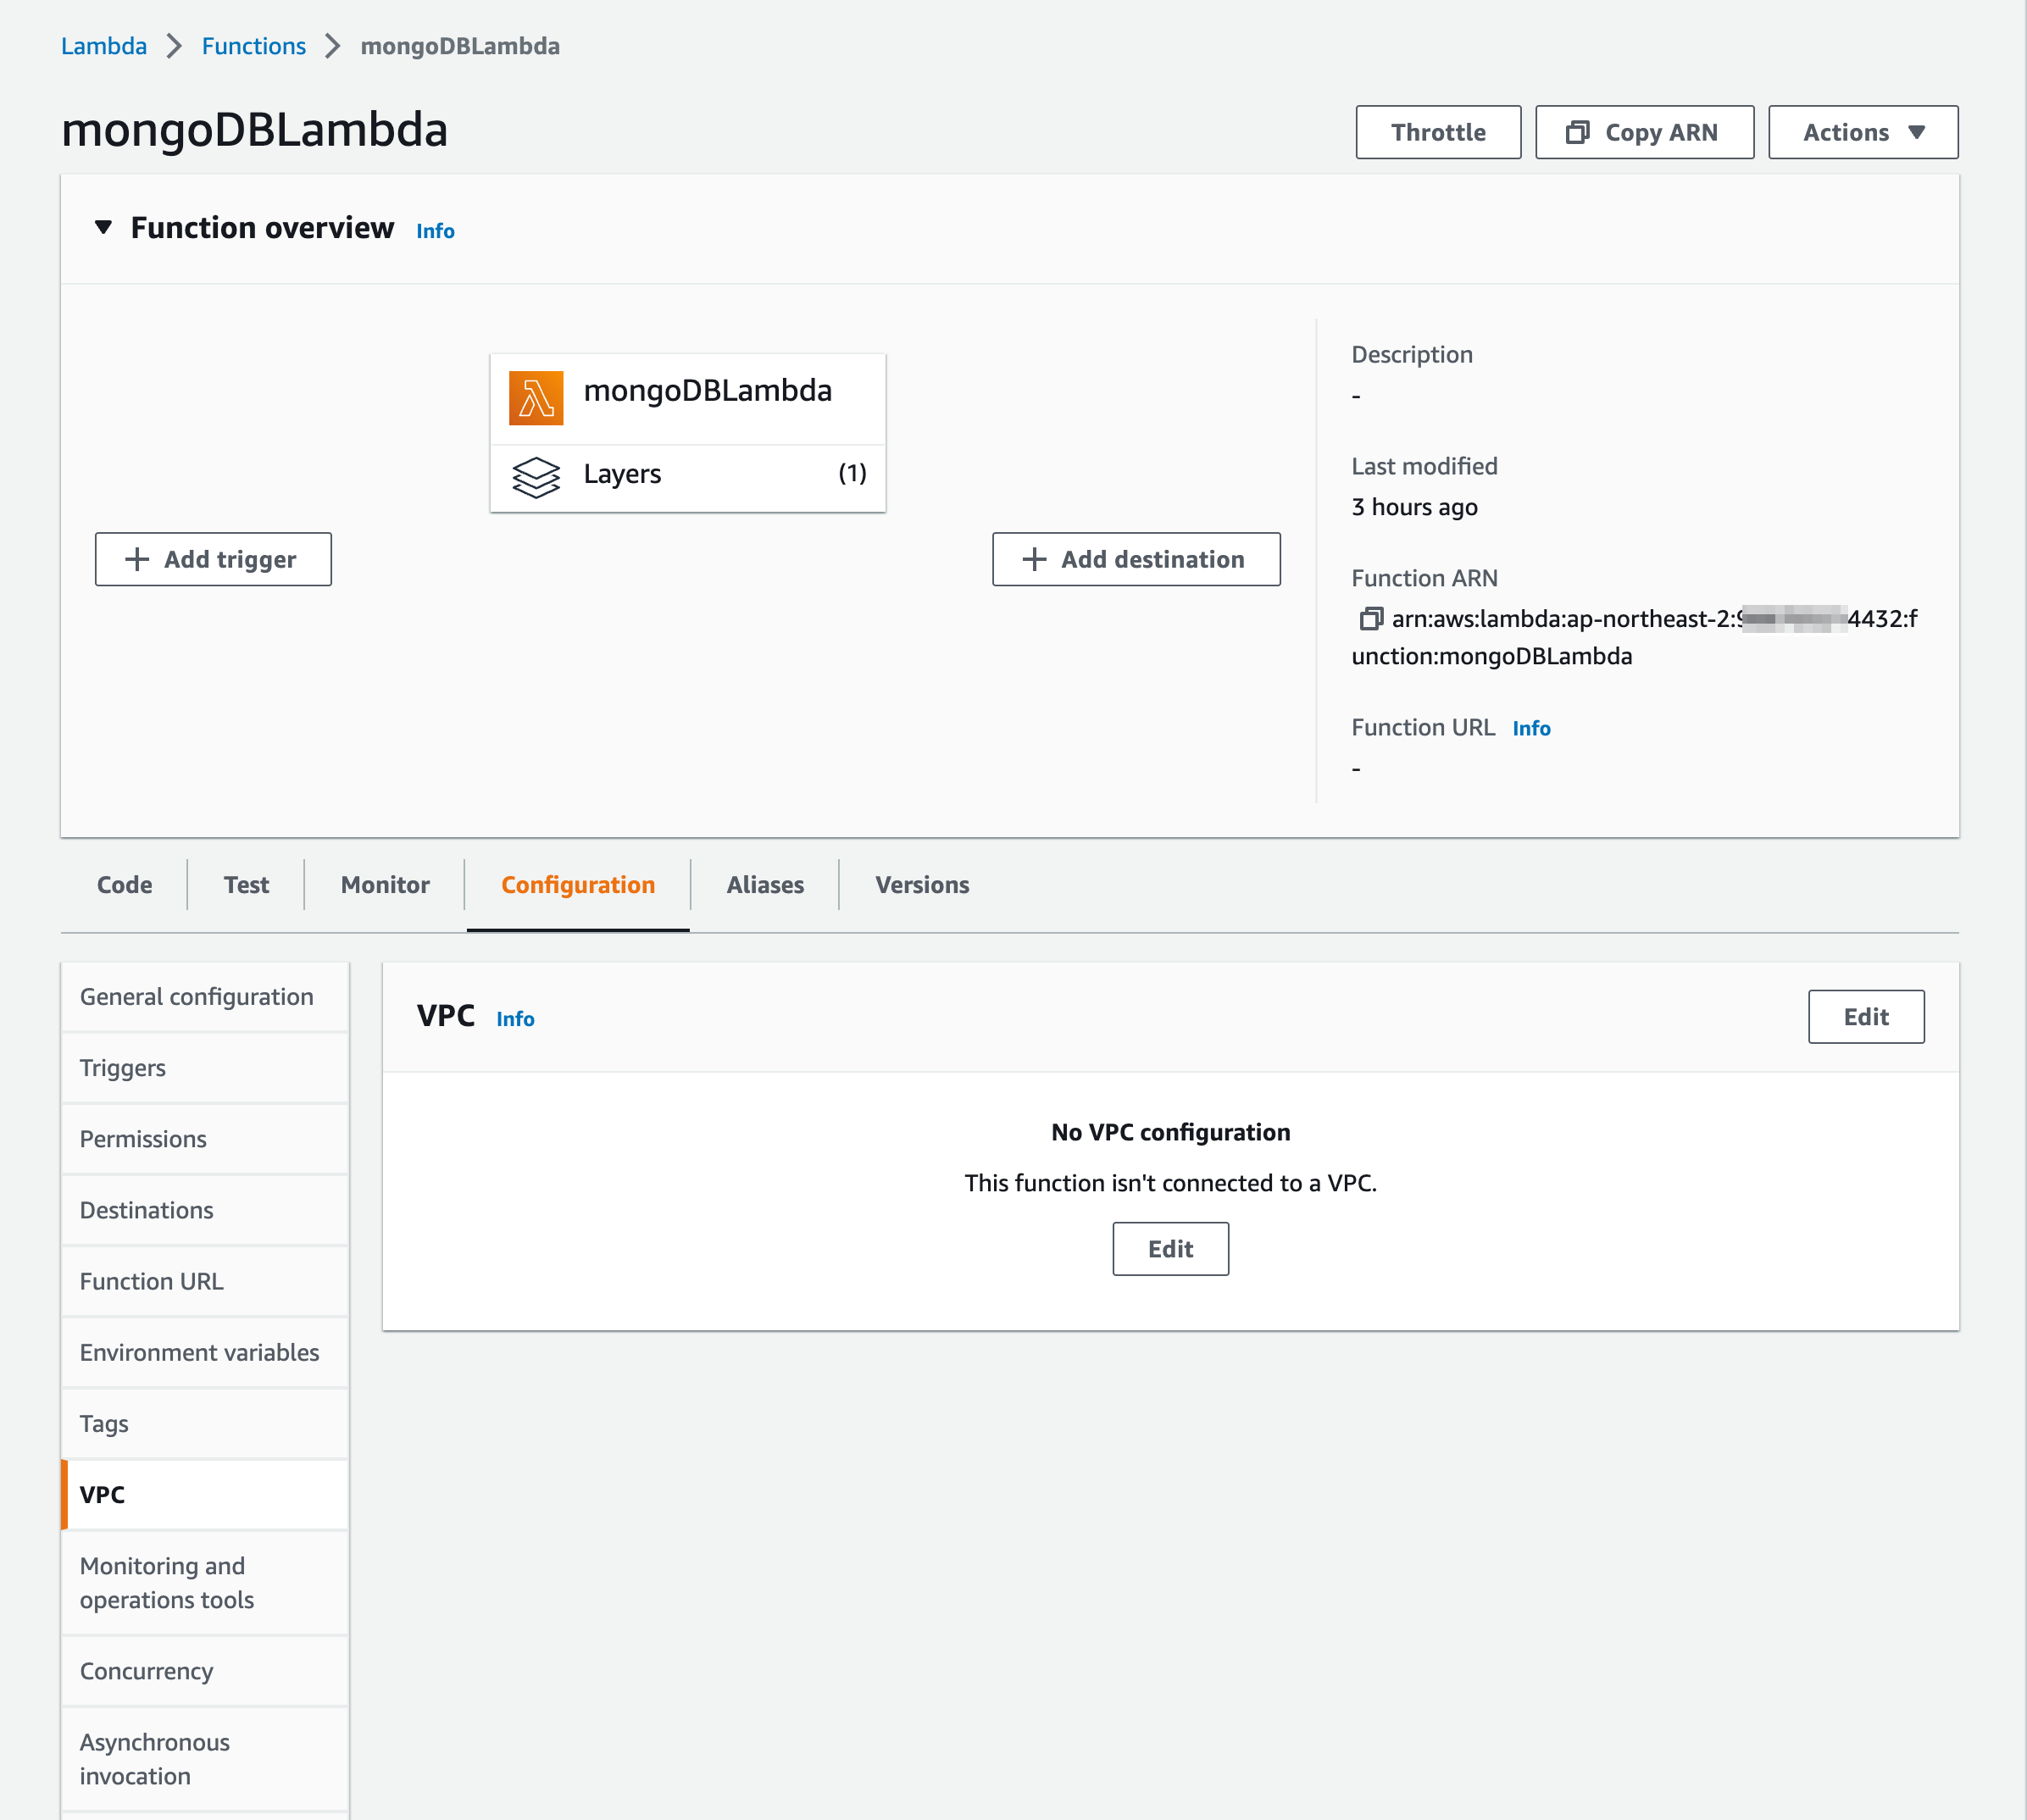
Now the connection is made. Let’s go back to the lambda and do the VPC configurations.
Go back to the lambda we created and choose Configuration and VPC. Then click Edit button.
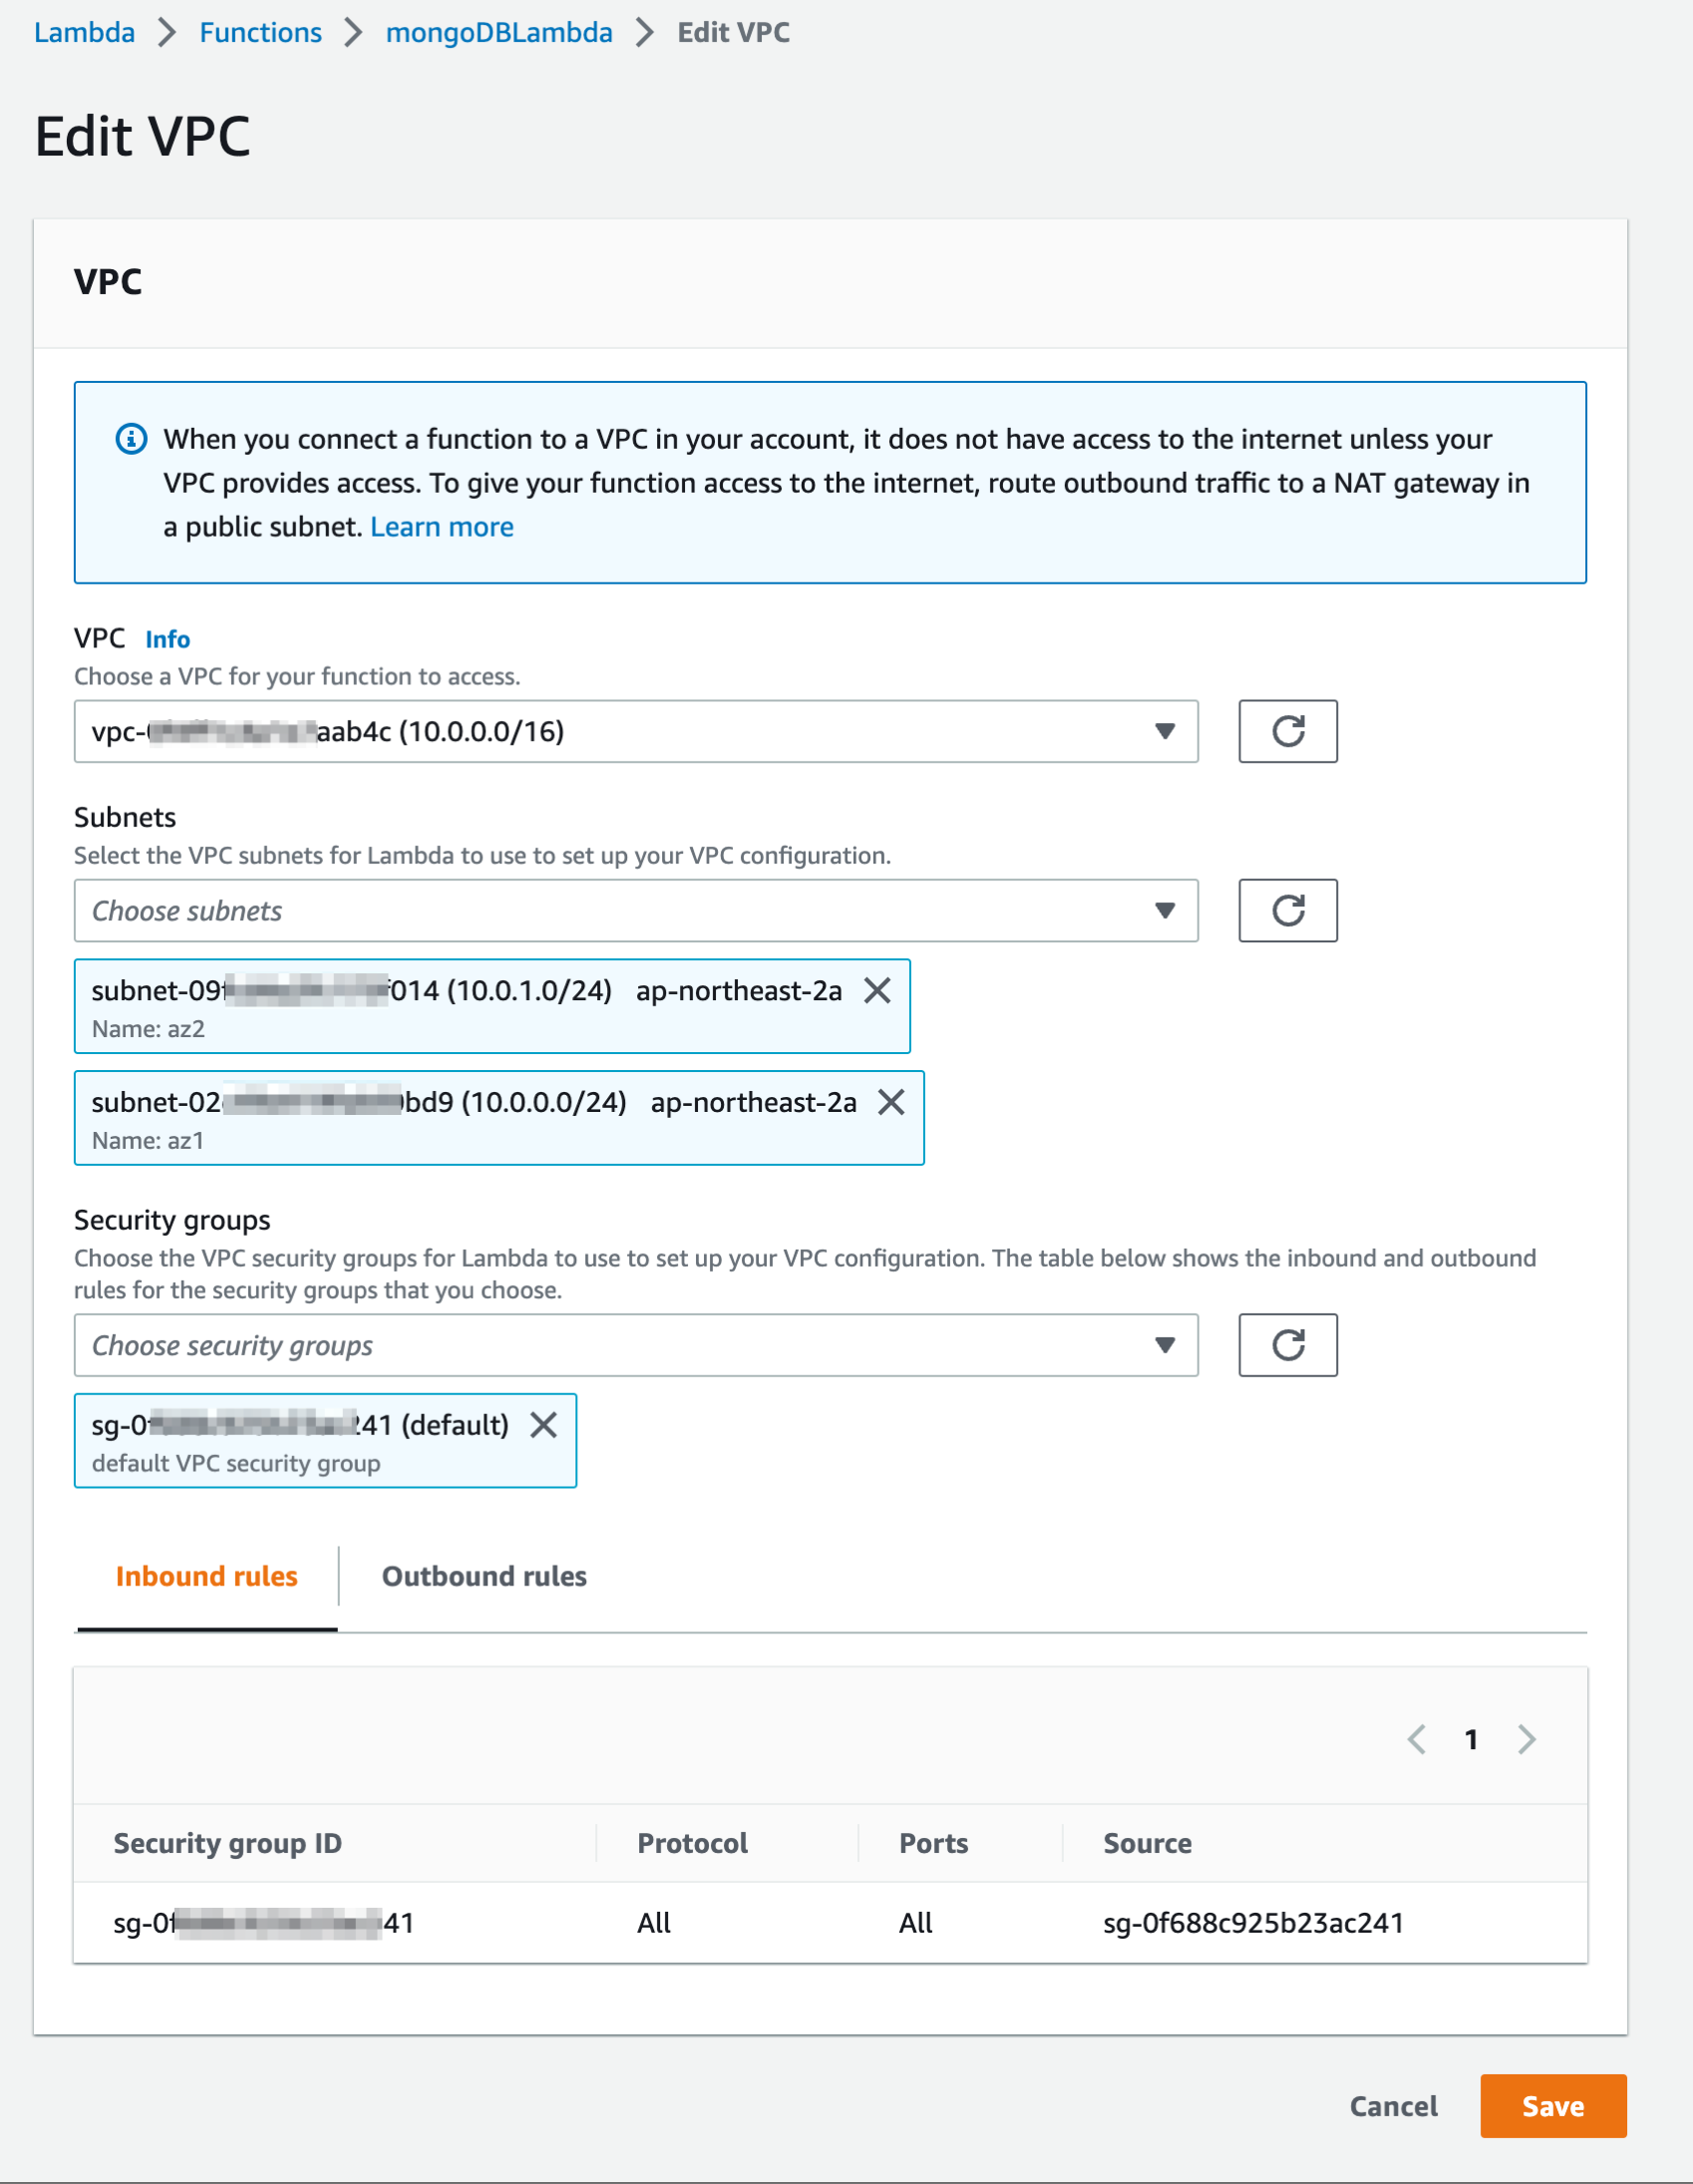
Then fill in the VPC information and click Save button.
Now the lambda and the MongoDB Atlas database are connected securely. Let’s do the same testing that we did at the beginning of this article. Now you will be able to see the “Connected successfully to server” in your log.
For more information about the VPC Peering Connection, you can refer to the MongoDB Atlas tutorial as well https://www.mongodb.com/docs/atlas/security-vpc-peering.
Editor / Park hyuntaek
Hyuntaek.park@twigfarm.net
